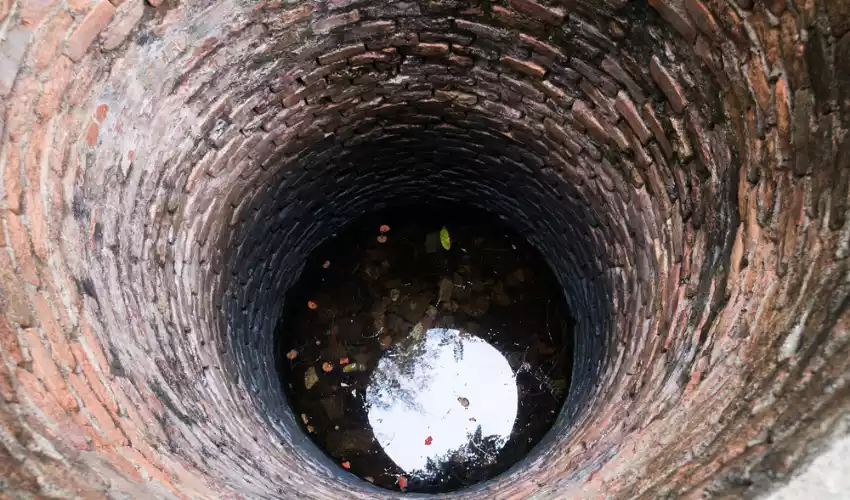
Water wells are a lifeline for many households, supplying clean and readily available water. However, the importance of keeping this vital resource free from contamination cannot be overstressed. On occasions, bacteria and other harmful microbes may find their way into the well, necessitating a disinfection process known as shock chlorination.
Shock chlorination is an effective method of disinfecting a well, eliminating any bacteria, viruses, algae, and other microbes present. It’s a process that involves introducing a significant amount of chlorine into the well, leaving it there for a period, and then flushing it out, leaving you with clean, safe water.
In reality, keeping a well disinfected is not just about the quality of the water, but it’s also about health safety. Shock chlorination, when done correctly, ensures your water remains pure, making it safe for household use, including drinking and cooking.
Essentials for the Process
Tools and Safety Measures
To ensure successful well disinfection, several tools and safety measures are crucial. These include a source of chlorine, clean water for mixing the solution, a hose connected to the well pump, and protective gear (gloves and safety glasses) to safeguard against accidental exposure to the chlorine.
Chlorine Source: Best Choices
Liquid chlorine bleach (household bleach) is commonly used due to its accessibility and effectiveness. However, it’s vital to use unscented bleach with a sodium hypochlorite concentration of 5-6%.
Step-by-Step Guide to Shock a Well
Calculate Water Volume
A critical first step to the shock chlorination process is to calculate the volume of water in your well. This is crucial as it allows you to determine the appropriate amount of chlorine needed for the process. You can achieve this calculation using the depth and diameter of the well. Depth and diameter information can be found in the well’s construction report. If these are not readily available, consult with a professional for assistance.
Mix Chlorine Solution
Once you have the well’s volume, the next step involves creating a chlorine solution. This solution is typically made by combining a specific quantity of household bleach with water. For every 5 gallons of water in the well, use half a gallon of bleach. Ensure the bleach is unscented and has a sodium hypochlorite concentration of 5-6%. Mix the solution in a clean, large bucket.
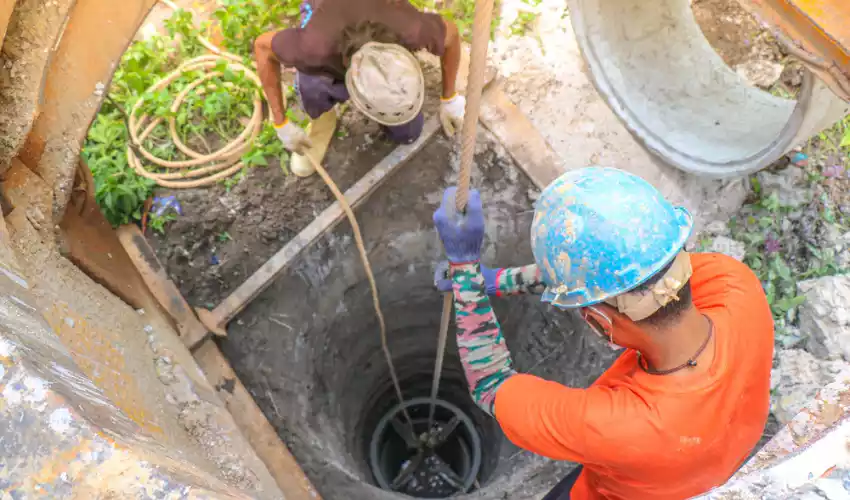
Introduce Chlorine to Well
Introducing the chlorine solution to the well is the next crucial step. Begin by pouring the solution into the well, using a clean, durable hose connected to your well pump. Ensure that the solution is poured evenly around the well’s circumference to ensure widespread coverage.
Recirculate Water
After introducing the chlorine solution into the well, the next step is to recirculate the water. Turn on the well pump, and using a separate hose, direct the water back into the well. This process of recirculation helps spread the chlorine solution throughout the well, ensuring every part of the well is treated.
Soak and Flush
The final step in the process is soaking and flushing. Allow the chlorine solution to sit in the well for a minimum of 12 hours. This duration allows the chlorine solution to interact effectively with the microbes, thus sanitizing your well. After soaking, flush the system to get rid of the chlorine solution. Use an outdoor faucet to avoid damaging your septic system or indoor plumbing. Continue flushing until the smell of chlorine is no longer detected in the water.
Chlorine Concentration: A Deeper Look
Ideal Chlorine Levels
The concentration of chlorine is a critical factor in the effectiveness of shock chlorination. Typically, the ideal chlorine concentration for shock chlorination ranges between 50 to 200 parts per million (ppm). However, if your well is heavily contaminated or hasn’t been disinfected in a long while, a higher concentration may be required.
Variables Impacting Concentration
The chlorine concentration needed for effective shock chlorination is influenced by several variables. For example, the level of contamination in the well can significantly affect the concentration. Heavily contaminated wells may require higher concentrations. Similarly, the depth of the well and the volume of water also influence the concentration. A deeper well with more water would necessitate a higher chlorine concentration.
Common Mistakes During the Process
Avoid these mistakes to ensure a successful shock chlorination process:
Incorrect Chlorine Measurement
One common mistake is incorrect chlorine measurement. Too much or too little can render the process ineffective. Always ensure you calculate the chlorine needed based on the well’s volume and not on guesswork.
Inadequate Soaking Time
Another common error is not allowing sufficient time for the chlorine solution to soak in the well. It’s recommended to allow at least 12 hours of contact time. An insufficient soaking period might result in incomplete disinfection, leaving behind some microbes.
Failing to Recirculate
Failure to recirculate the chlorinated water back into the well is another mistake that can hinder the process. Without proper recirculation, the chlorine solution might not reach all parts of the well and the plumbing system, resulting in an ineffective disinfection process.
Alternatives to Shock Chlorination
While shock chlorination is a popular method to disinfect water wells, there are other methods available that are just as effective.
Continuous Chlorination
Continuous chlorination involves the ongoing addition of chlorine to the water supply. In this method, a chlorine solution is injected into the water using a pump. This provides a constant level of disinfection, eliminating bacteria and other microbes continuously. It is often used in wells that have a constant bacterial problem.
Ozone Water Treatment
Ozone water treatment is another alternative for well disinfection. It involves injecting ozone gas into the water. The gas readily reacts with bacteria, viruses, and other harmful substances, neutralizing them. This method is often chosen for its efficiency and because it doesn’t leave any harmful residue.
Ultraviolet Disinfection
Ultraviolet (UV) disinfection utilizes UV light to eliminate harmful organisms. The UV light disrupts the DNA of the microbes, rendering them harmless. UV disinfection systems are easy to maintain and do not add any chemicals to the water, maintaining its taste and odor.
Maintenance Tips Post-Shock
Proper maintenance of your well is crucial post-shock chlorination. It helps ensure the water remains safe for use.
Regular Well Inspection
Regular inspection of the well is one way to maintain its good health. Schedule annual check-ups with a professional who can assess the condition of your well. They will look for signs of wear and tear, mechanical issues, and contamination risks.
Water Testing: When and How
Water testing is another crucial maintenance tip. Test your well water at least once a year for bacteria, nitrates, and any other contaminants specific to your area. Additional testing is recommended if there are changes in water taste, color, or odor. Use a state-certified laboratory for the most accurate results.
Recognizing Contamination Signs
Be vigilant about any signs of contamination in your water. This includes changes in taste, color, or smell. If you notice any of these signs, stop using the water and have it tested immediately.
Effects of Shock Chlorination
Shock chlorination has both short-term and long-term effects.
Short Term Implications
Immediately after the shock chlorination process, your water may have a strong chlorine smell and taste. This is normal and should dissipate after you flush the system. You might also see discolored water initially due to loosened deposits in the well and pipes.
Long Term Impact
In the long term, shock chlorination can significantly improve your water quality by eliminating harmful bacteria and other microorganisms. However, it’s important to note that if the source of contamination isn’t addressed, bacteria may return, and you might have to repeat the process. Regular maintenance and testing are vital to ensure the long-term safety of your well water.
FAQs on Well Shocking
Is shock chlorination safe for wells?
Yes, shock chlorination is safe for wells when done correctly. The chlorine concentration used in shock chlorination is not harmful to the well’s structure.
What should I do if my well water still smells after shock chlorination?
If the water continues to smell, it may indicate that the contamination level was high, and a second round of shock chlorination is necessary. If the issue persists, consider seeking professional assistance.
Can I drink the water immediately after shock chlorination?
No, the water should not be consumed until the chlorine has been completely flushed out of the system.
Conclusion
Maintaining a clean, bacteria-free well is vital for the health and well-being of all who rely on it for their water needs. Shock chlorination, a tried and true method, plays an integral role in achieving this, ensuring that the water you consume from your well is safe and clean.
While the process might seem overwhelming at first glance, with careful preparation and an understanding of the process, you can efficiently and effectively shock your well. Always remember, the key to success is a thorough application of the steps and a keen eye on safety measures.
Finally, well maintenance doesn’t stop at shock chlorination. Regular testing, inspection, and vigilance are critical in ensuring your well water remains of high quality. Whether you choose to shock your well or opt for an alternative method, the end goal remains the same – safe, clean, and reliable water for you and your family.